The Sounder replacement procedure takes approximately 15 minutes and will require: – replacement sounder (gray microphone cable lengths will vary depending on well configuration)
Step 1: De-power Sensor
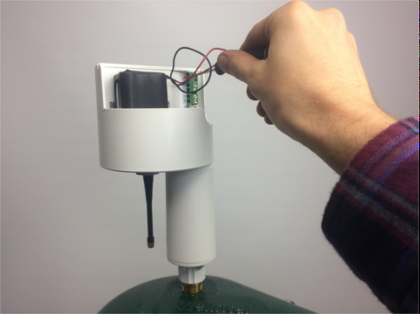
Use a small screwdriver to disconnect battery, solar or AC power leads and CT wires, if installed. A battery powered Sensor can remain powered during this procedure, but take care not to drop the battery out of its slot. If using solar or AC power source.
Tape solar or AC adapter power wires so they are NOT touching one another and remove wires from the bottom port.
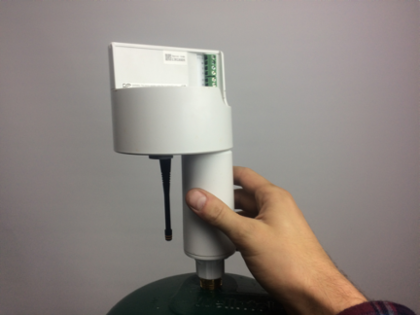
Step 2: Remove the Sensor from Wellhead
Unscrew Sensor counterclockwise by holding the base and rotating the sounder as shown. Make sure to leave the threaded wellcap interface installed on the wellcap, not the sounder.
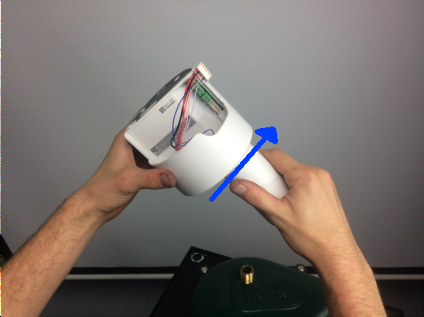
Step 3: Unscrew the Sounder from Sensor
Unplug the Sounder interface from the terminal labeled “Sensor” by holding wires at the base of the interface firmly and pulling directly outwards. Hold the Sensor steady and turn Sounder left

Step 4: Install the New SP4 Sounder
Insert the new Sounder interface through the Sounder hole.Thread the hex-nut onto the Sounder’s threads, turn to the right 3 turns.Seat the hex-nut in the housing cavity and turn the Sounder to tighten until snug.Plug the Sounder interface into the terminal labeled “Sensor, with the red wire on top.
Step 5: Install the Sensor Back on the Wellhead
Carefully feed SP4 through the ½” access port
Twist clockwise, securely attaching the Sensor to the threaded interface
Step 6: Repower Sensor
If using solar or AC line power, thread wires through the port. Then remove the tape and connect wires to the Sensor terminal. Red (positive) on top, black (negative) beneath.
Wait 60 seconds after repowering
Step 7: If Sensor is a Telemetry Unit, Perform a Sensor Reset

